Friday, June 26, 2009

Cucumber Sandwiches

Mmmm yum! I love these sandwiches! Quick, easy, and can be made the night before . My mom got this recipe from my god-mother and used to make these as hors d' oeuvres for company on little rye breads, but I prefer a regular sized sandwich for lunchtime.

What to use:
1/3 Less fat cream cheese (also called Neufchâtel cheese)
Packet of Italian dressing seasoning mix
Dried dill
Dried celery seeds
Cucumber
Bread slices of your choice (I had whole wheat)


What to do:
1. Peel and slice the cucumber-about 1/2 fits nicely on regular sandwich bread.


2. In a bowl, spoon in some cream cheese, however much you feel should cover your sandwich-I used about 2-3 tablespoons. Add a few shakes of the dill and celery seed, and about a dime sized amount of Italian seasoning mix (for this amount of cream cheese). Mix it well to combine. Here you need to taste it to see if it needs more of something. If you feel you put too much seasoning, add more cream cheese.


3. Next, spread the cream cheese mixture on both sides of the bread, so that the cucumbers have something to hold on to. Lay the cucumber slices on top of the cream cheese filling up each side. Then sprinkle more dill all over the two sides.


4. Put one slice on top of the other and cut in half to enjoy! If you are making this the night before, wrap in plastic or foil and refrigerate.

Apricot Upside-Down Cake


Summer fruit is my all-time favorite! My grandmother used to have an enormous apricot tree that gave the best-tasting apricots. Every year she would make jam, and my dad would make pie. A coworker of mine has some extra apricots, and I said I would make something if he brought them in. So, this is my version of a Better Homes and Garden Pineapple Upside Down Cake, using apricots. It was delicious-definitely a crowd-pleaser!
**The apricot recipe is enough for 2 upside-down cakes. You will need to double the cake recipe below if you want to make 2 cakes.

Apricots:
This was not a real recipe, but something I made remembering what apricot pie filling kind of tasted like. So this is what I came up with to use on the bottom of the cakes instead of canned apricots. I used about 2 pounds of apricots for this recipe, eye-balling how much I would need to cover 2 9-inch cake pans. If you only make one cake, you would obviously need fewer apricots. However, you could always save the rest of the cooked fruit for other things, like topping ice cream or cottage cheese.

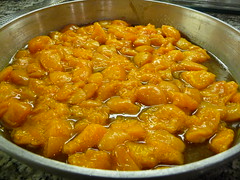
1. Heat a large sauce pan over medium-high heat and add a couple pats of butter to melt. Chop the apricots into bite-size pieces and add to the pan.

2. Add a few tablespoons of brown sugar to the apricots, a couple dashes of ground cinnamon and some nutmeg or allspice. I like using fresh ground nutmeg because it smells so good and its fun to use the micro-planer (which will be featured on its own post one day).

3. Let the apricots simmer and cook away for about 10 minutes until they are soft.
4. Turn off the heat and let them cool a bit before adding them to the cake pan. To help them cool and drain, I poured them into a strainer over a bowl. Save some of the juice for the cake mixture.

Cake:
The parts that are in italics are the pieces of the recipe that I altered from the original. The rest of the recipe is taken from the Pineapple Upside-Down Cake recipe from the Better Homes and Gardens Cookbook 75th Anniversary Edition, page 164. Some things have been left out of the original as well.

Oven: 350*F
Bake : 30 min
Makes: 1 9-inch cake or 8 servings

2 tbsp butter
1/3 c packed brown sugar
1 tbsp water
1 1/3 c all purpose flour
2/3 c granulated sugar
2 tsp baking powder
1/8 salt
1/3 c milk
1/3 c juice from the apricots cooked beforehand
1/4 c butter, softened
1 egg
1 tsp vanilla


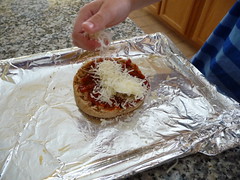
1. Melt the 2 tbsp butter in a 9-inch cake pan. Stir in the brown sugar and 1 tbsp water. Add in enough cooked apricots to cover the entire bottom of the pan. Set pan aside.
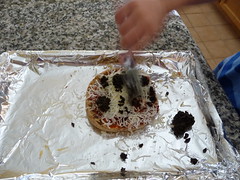
2. In a medium mixing bowl, stir together flour, granulated sugar, baking powder, and salt. Add milk, juice, 1/4 c butter, egg, and vanilla. Whisk together to combine or mix with an electric mixer. Spoon batter over fruit in the prepared pan so it is evenly distributed over the fruit.
3. Bake at 350* for 30-35 minutes or until a wooden toothpick inserted near center comes out clean. Cool on a wire rack for 5 minutes. Loosen cake from pan; invert (turn upside down) onto a plate or serving platter.
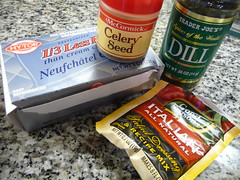
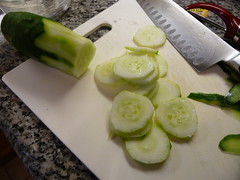
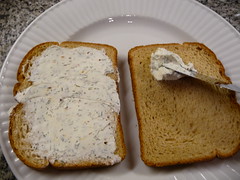
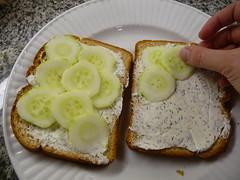
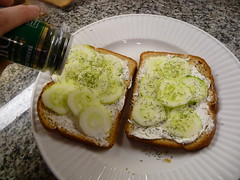
Wednesday, June 17, 2009

Easy Crock-Pot Chicken

This is considered a staple in my house. I cook a whole chicken in the crock pot over night, or during a lazy Sunday, and then freeze the shredded meat. The chicken is ready to use in pastas, salads, quesadillas, enchiladas, sandwiches, soups and anything else you can imagine. I just take out what I need and thaw it on the counter or in the microwave. It's cheap, easy, and makes last-minute dinners without having to get fast-food.

Ingredients:

1 whole chicken
3-4 carrots
3-4 celery stalks
1 medium to large onion
Salt/pepper
Poultry seasoning
Garlic powder
2-3 bay leaves
Liquid of your choice-water, chicken or vegetable broth, white wine

Directions:
1. Chop up the carrots, celery, and onion. Everything should be quartered so that it lasts through the long cooking process.


2. Prepare the chicken in a clean sink by removing the innards and any extra fat that is visible around the end openings. You don't have to do this, but it just grosses me out and unnecessary. Rinse the chicken under running water, inside and out, and then pat dry with paper towels. Place inside the crock pot.
3. Sprinkle the chicken with the salt, pepper, poultry seasoning and garlic powder. Make sure each spice gets all over, around and inside the chicken.


4. Add a few pieces of each vegetable underneath the chicken so it is sitting on them. Then toss a few pieces of each inside the cavity of the chicken as well. The remaining veggies put on top of the chicken. Throw the bay leaves on top.


5. Add enough liquid to fill the crock pot about half way. It should cover at least half of the chicken. If you are using wine, I suggest doing half wine and half water or broth.
6. Place the lid on the crock pot and set for your longest cook time; mine gets set on Low for 8 hours.


7. When the chicken is done, the meat should fall off the bones. Depending on the size of the chicken, this might not take all 8 hours. Remove the chicken from the crock pot, leaving the liquid inside the pot.
8. Shred the meat with two forks (just like in the Pulled Pork recipe from a previous post) or leave in pieces and place in a freezer bag. Label the bag with a Sharpie marker so you know when it was made and what it is and freeze. You're done and ready to begin making lots of easy quick meals for the next month or so.

Tips:
*I usually buy 2 whole chickens at a time-one to freeze, and one to cook-so I always have this on hand. Its the easiest thing to do last minute, and it cooks while you are sleeping or at work!
*Season the chicken however you like- use cumin and chili powder if you want a more Tex-Mex flavor, or add fresh herbs and lemon when you have them on hand.
*Be sure to clean everything really well when handling raw chicken. I usually take the lids off of all my spices before I use them so I can hold the chicken in my left hand and sprinkle with my right. This way I don't have to constantly wash my hands and nothing gets contaminated. Don't forget to clean out the sink if you prepared the chicken in there.

Tuesday, June 9, 2009

Lemon Rice Soup


This is a great summer dish and a good way to use lemons if you have a tree. My friend Janice and I went to YassoYani's, a local Greek Restaurant in Stockton, and loved this traditional soup. I fell in love with the fresh flavor of the lemon and the creamy texture of the soup. It was refreshing, yet filling at the same time. So of course, I had to find a way to recreate it and make it better. So with the help of an online recipe I found to start us off and some fresh ingredients from Janis's garden this is what we created....delish!!

This recipe will make 3 bowls, so I suggest doubling it so there is more!

Ingredients:
1 can condensed cream of chicken soup
1 1/4 cup milk
3/4 cup lemon juice
1 cup cooked rice
garlic powder to taste
salt & pepper to taste
1 tsp or more fresh thyme leaves (strip the leaves off the stems)
3-4 leaves fresh basil (cut them into strips)
lemon zest
Optional: shredded chicken

Directions:
1. In a saucepan, heat up the chicken soup and milk over medium heat until it boils. Whisk the soup while its heating to prevent burning.
2. Once heated through, add the rice, garlic powder, salt, pepper, thyme and basil, saving just a bit of the herbs to top the soup. Then add the lemon juice, a bit at a time first then stir and taste. Add more lemon juice if you want a stronger lemon taste. Let it continue to heat through and simmer for at least 5 minutes to let the flavors blend. If you chose to add chicken, stir it in before you are ready to serve the soup.
3. To finish it off, ladle the soup into bowls and sprinkle the lemon zest and remainder of the herbs on top. Serve warm and enjoy!

Pizza for the non-cook (or kids)


This is a great fast snack, lunch, or dinner. It's so easy too that it can be done in about 10 minutes (maybe less, I didn't really time it) and my 2 1/2 year old can help. So for those of you who are intimidated by cooking, or don't have things to cook with, this recipe is for you!

What you need:
Toaster over (or oven if necessary, but my toaster oven heats up faster)
English muffins
Pizza sauce or tomato sauce
Italian seasonings (either all in one, or oregano, thyme, rosemary, sage)
Grated cheese (any kind you like)
Any other toppings you like- this time we used chopped olives

What you do:
1. Turn on the toaster oven to about 400*.
2. Split open 1 English muffin and place on the toaster oven baking sheet.
3. Spread with the sauce, sprinkling the sauce with the seasonings if you want to add some pizazz.

4. Add toppings of your choice.

5. Bake until the cheese melts, about 3-5 minutes.
6. Enjoy!

Tuesday, June 2, 2009

Easy Gourmet Dinner-Stuffed Portabello Mushrooms


So I love making dinners that look impressive, but are actually really simple. I think this one falls into that category. Stuffed portabello mushrooms are very filling and don't need much else along the side. Makes a great summer meal!

What I used:
1lb lean ground beef (only half is used for the mushrooms, the rest I saved the other things, like burritos)
1/2 small shallot
Minced garlic
Worcestershire sauce
Two cleaned portabello mushrooms
Olive Oil
Montreal Steak Seasoning
Grape tomatoes
Fresh mozzarella cheese (the kind in water)

What I did:
1. Cook the ground beef in a hot pan, letting it brown up. While it's cooking, I added the chopped shallot, garlic, and steak seasoning. When it was almost done, I shook in some of the Worcestershire sauce-about 5-6 good shakes.

2. While that was cooking, I wiped off the mushrooms with a damp cloth, and then scooped out the inside with a spoon to make room for the filling.

3. I then brushed each mushroom with olive oil (top/bottom/sides), sprinkled them with Montreal seasoning and placed them onto a hot grill pan. They took about 5 min each side to soften up on medium-high heat.

4. When everything was almost done, I coated some grape tomatoes with olive oil and the seasoning and threw them right onto the grill next to the mushrooms. I let them cook until they started to burst.

5. To assemble, I filled each mushroom with some of the ground beef and then topped that with some of the tomatoes and mozzarella cheese I diced up.

6. To complete the meal I served it along side some sliced veggies (I had fennel, maybe a topic for another day, and bell peppers) and a couscous/grain mix I got at Trader Joe's.


Variations:
I would have topped it with basil, but I forgot to buy some at the store. If you want to be meat-free, stuff the mushroom with couscous or rice. Really you can use anything to stuff the mushrooms, so be creative and share with us your creations!

PS Trader Joe's is one of my FAVORITE places to shop! It might have to be its own topic one day..a trip to the best grocery store :)