Sunday, December 4, 2011

Fun with Phyllo


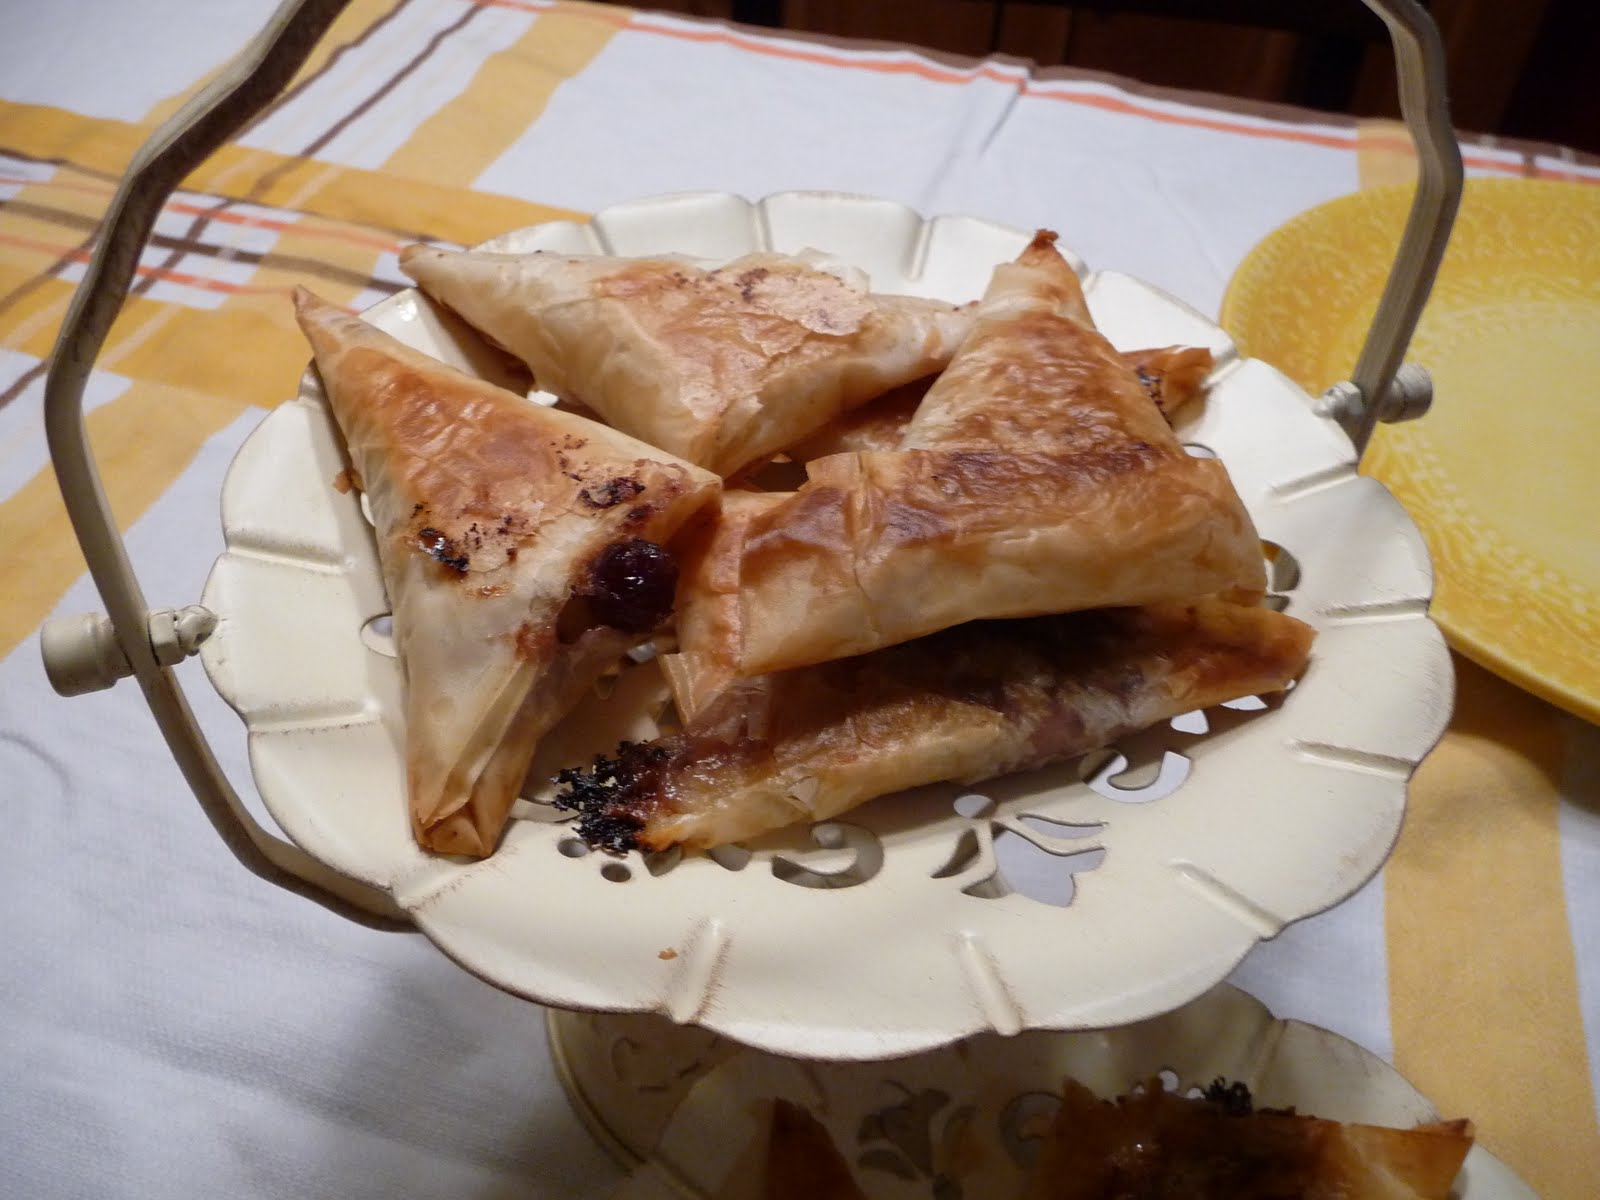
If you have never cooked with phyllo dough, it can be quite intimidating, but really you can't mess it up too much. Once it's cooked, it's flaky and buttery, so of course it's delicious! I made these two recipes from ingredients that are great together. For each one,  the method was pretty much the same, just with different fillings.

Filling #1: Brie and Cranberry Phyllo Puffs

When I was in England, I was introduced to brie and cranberry sandwiches. The combination of the sweet cranberry and the smooth texture of the cheese is amazing on a crusty baguette, and just as tasty in buttery flaky pastry.

Filling #1 Brie and cranberry
I cut a small piece of brie cheese and laid it onto the dough. Then I topped the cheese with a bit less than a teaspoon of canned whole cranberry sauce.


Filling #2:  Pumpkin Phyllo Puffs

Pumpkin Butter is an amazing find from Trader Joe's! It used to be only available during the holidays, but now they have it year round in the jam/jelly section. Most of the time I just eat it on toast with goat cheese. So I was excited when I came up with this recipe so that I can use more of the yummy pumpkin butter.

Filling #2 Pumpkin Cream Cheese
I combined about 4oz (half a box) of cream cheese with about 1/2 cup of Pumpkin Butter. Whisk to make a smooth mixture. I used a little less than 1 tbsp for each triangle.


Assembly directions for Phyllo Puffs

Prep your workspace:

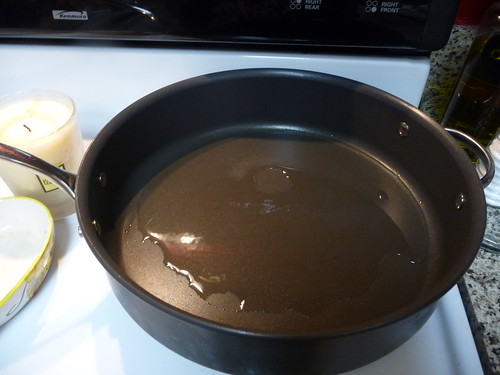
1. Melt butter in a saucepan over the stove.. I used about 1 stick for half a box of phyllo dough (which is enough for one of these recipes)

2. Lay out the phyllo dough on the counter with a damp cloth or plastic wrap on top. This prevents it from drying out.

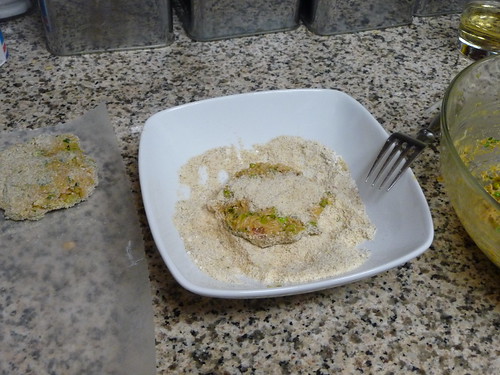
3. Line a cutting board or the counter with wax paper to build your masterpieces on. Also line your cookie sheets with foil or parchment paper so you don't have to wash them at the end.


Build your masterpieces:

1. Carefully lift one sheet of phyllo dough ( yes it's thin like paper) onto your wax papered cutting board. Brush on a layer of butter all over the one sheet.

2. Next, carefully take a 2nd sheet of dough and place it directly on top of the first one that has been buttered. Repeat the buttering.

3. Repeat until you have 4 buttered layers of dough stacked together.

4. Take a sharp straightedge knife, and cut the dough lengthwise into 3 strips about 2-3 in wide.(In the picture you will see I cut 4 strips along the width of the dough. It really doesn't matter, but after doing it that way, I realized you get longer pieced to fold if you do it lengthwise.)

5. Add the filling to one end of the strip of dough. Begin folding the triangle, carefully sealing the edges. If there is not enough butter to seal edges, add more. Keep folding until you have a nice enclosed triangle. Lay it on the baking sheet. Repeat until you have used all your phyllo dough. 

6. Bake at 350* for about 10-15 minutes. Keep a close eye on these since they can brown quickly and if not sealed properly can leak filling which can burn.

7. Let them cool a bit before serving and Enjoy!

Hints:
* Don't spend more money than you need to for a pastry brush. Buy some cheap wood handled paint brushes from the hardware store to use in the kitchen for brushing butter on phyllo dough, basting meats with barbeque sauce, etc.
*Use any of your favorite ingredients for fillings, following the same method. 


Friday, April 22, 2011

Arugula Pesto Chicken Wrap


I'm pretty sure I was inspired by Rachel Ray one day when I made up this recipe. She makes a lot of easy pesto sauces in her Cuisinart, so I decided to do the same.  For the pesto, instead of olive oil, I used a bit of mayo for a lighter taste than olive oil, but I thinned it out with chicken broth.  I was able to get the right consistency without using too much mayonnaise, ie fat. This recipe makes about 1-2 wraps, depending on how hungry you are, but it is easily adaptable to make enough for 10 if needed.  It's also a very colorful dish which is important since we eat with our eyes first!

What to use:

Arugula
Mayonnaise
Chicken broth
Roma Tomato, chopped
Salt/pepper to taste
Parmesan cheese (optional)
Juice and Zest from 1 lemon
Roasted Chicken patties, chopped (from Trader Joes, could substitute any cooked chicken you have on hand)
Flat bread (Trader Joes Lavish Bread is yummy, but again any wrap/tortilla would be fine)

What to do:

1.   In  a Cuisinart, place a couple handfuls of washed/dried arugula leaves.  Add about 2-3 tsps of mayonaise as well.  Start pulsing it to roughly chop the leaves.

2.  Once the arugula starts getting chopped finely, stream in the chicken broth while its on low.  Add just enough to give it a spreadable consistency, start with a tablespoon or so and add more if needed.  Also add salt and pepper to taste, and a small handful of Parmesan cheese if desired.

3.  Place the pesto in a bowl and add the chopped tomatoes and chicken.  Zest the lemon into the bowl. If you want more lemon flavor, add the juice of 1/4 of the lemon.  Taste, and add more seasoning if needed.


4.  Spread the pesto-chicken mixture onto the flat bread or wrap, roll up, and enjoy!


Hints:
*Remember, you can't take out salt or pepper, so start with a little. Taste as you go, and add more if needed.
*If you made too much pesto, put some aside before you add the chicken and tomatoes.  Use it on pasta, hot or cold, or mix it into scrambled eggs.

Thursday, March 17, 2011

Crab Enchiladas


Like many people at the start of a new year, I attended a crab feed.  I didn't like crab until I started having to work a crab feed and got fed for free.  So now I love it!  And you can't leave without  leftovers! So what do you do with a whole bowl full of crab? First you have to shell it - a  long tedious process, but goes fast when you are catching up on Netflix.  Then you make something good.  This recipe is my version of crab enchiladas.  It's light and not fishy tasting at all.  I used healthier ingredients, like low-carb tortillas, and low fat cheese - and I didn't really miss the real stuff. However, if that is not appealing to you, by all means bring on the carbs and fat!


What I used:
 
shelled crab meat
1 can corn, drained
2 tomatoes, diced
2 green onions, chopped
handful cilantro, chopped
low-carb tortillas
low fat "mexican style" shredded cheese
1 jar salsa verde (probably should have used 1 1/2 - 2 for this much, depending on how much sauce you like
sour cream
glass baking dish


What I did:

1.  First I prepared all my ingredients-drained the corn, chopped the tomatoes, onions, and cilantro.  I also ran my fingers through the shelled crab to break it up and make sure no shells were left behind.
2.  Next I prepared the enchiladas.  On each tortillas, I put about a tablespoon of crab meat, then sprinkled on some corn, tomatoes, green onions, and cilantro.  I topped it off with a small handful of shredded cheese.   

3.  Once filled, roll the enchilada and place in a glass baking dish.  As you can see, I ended up making enough to fill two glass dishes.
4.  Once all the enchiladas are completely assembled, pour the salsa verde over the top and sprinkle with more shredded cheese.  Cover with foil and bake at 350* for about 30 minutes or until the cheese and sauce bubbles.  You can remove the foil towards the end if you want the top to brown slightly. 
5.  When ready to serve, dollop some sour cream on top. Enjoy!!

Crock Pot Beef Stroganoff

Sometimes with new recipes I really amaze myself- like with this one. Mainly because I have never made beef stroganoff before and went with my own version after looking up a few online.  Most of the time when I do that, the food comes out so-so. But not this one. If I can eat it three days in a row - it must be good!  There was enough for a small army, or maybe a family of 4 with leftovers. So if you are cooking for one a lot like me, invite some friends over, or just keep eating it for every meal.  My version of beef stroganoff is made in the crock pot, so it's super easy and besides chopping veggies, so it doesn't require much effort.  This dish was also approved by my picky 4 year old!


What I used
2 medium carrots
2 stalks of celery
2 garlic cloves
1/2 white onion
2 cans of condensed cream of mushroom soup
1/3 cup chicken broth
1.5 pounds London broil
1/2 cup light sour cream
salt and pepper, if needed
1 lb pasta, cooked al dente, and drained

What I did

1.  First prepare the veggies.  Shred the carrots using a cheese grater.  Then finely chop the celery, onion and garlic.
2.  Next, add all the ingredients (except the sour cream) into the crock pot.  Set it on high for 4 hours.  About half way through check your dish.  Mine looked like it was browning too much, so I switched it onto low. Total cooking time was about 5 hours. 
3. Once the meat is cooked through, take it out and place it onto a cutting board. Using 2 forks, shred the entire piece and set it aside. This is also a good time to taste the sauce. If you'd like, add salt and/or pepper if it needs it. When the meat is almost finished, boil some water in a large pot for the pasta and cook to your liking. 

4.  Before adding the meat back into the pot, add the sour cream to the crock pot sauce and stir to combine.  When the sauce is mixed completely, add the meat and the pasta.  Mix everything together and enjoy!
Hints
* London broil is usually inexpensive. My mom suggested I buy it for stew meat, because it's a very lean piece of meat.  This piece I bought was less than $4.
*I top all pasta with Parmesan cheese, so if you are like me, go for it!
*If I have a lot for one recipe,  I will take out my Cuisinart to shred carrots because using a grater scares me sometimes. So in order to protect my fingers, I found a little trick by putting the carrot on the end of a fork and using that to hold the carrot as i grated it.  You have to keep moving it to different sides, and you end up with a bit at the end that you can grate, but I still have all my fingers and no cuts!

Thursday, May 27, 2010

Crab Cakes


So once again I had leftover crab meat. And one of my favorite things to eat is crab cakes! I don't like them overly saturated with mayonnaise though, so I only use enough to keep the cakes together.  I also experimented here with the seasonings, and was excited to find how great it came together.  Crab cakes are like meatballs though- you can really add anything you want.  So try these first, and then experiment on your own!


What I used:

shelled crab meat
cilantro
green onions
ground mustard
chili powder
salt/pepper
mayonnaise
Italian style bread crumbs (plain is fine too)
1 egg
Canola oil
1 lemon

1. Run your fingers through all the crab meat to double check there are no pieces of shell.  Also, this helps break up the larger clumps.

2.  Chop the green onion and cilantro and add them to the crab meat. Then add the seasonings:  salt pepper, dry mustard, chili powder. Mix to combine.
3.  Spoon in some mayonnaise, maybe a tablespoon worth and squeeze in some mustard too.  Stir the mixture so that everything is incorporated together.  Now is the time to taste it and adjust the seasonings.  Once you add the egg you will have to cook it to taste it, so add more salt or pepper or spices if you want more, or even more mustard or mayonnaise.

 4.  Time to add the binding ingredients-the 1 egg, beaten with a fork or whisk, and some breadcrumbs.  Stir to combine.  The mixture should look wet, but should stick together if you make a patty. So add more breadcrumbs if you find that it's not sticking together enough.

5.   Next pour a someo canola or vegetable oil in a deep pan and heat it up over medium to medium high heat. 


 6.  While the oil is heating up, make your crab cakes.  Form a patty, just like you are making hamburgers, and dip into a bowl of breadcrumbs to coat the entire cake.  Set aside on waxed paper.

7.  Test the oil to see if it's ready.  Take a pinch of the breadcrumbs you used to coat the crab cakes and throw it in the oil in the pan. If it starts to sizzle and bubble right away,  the oil is hot enough, if not, wait. Don't be tempted to turn up the heat.  It may get hotter faster, but it will also burn your food. Once the oil is ready, place the crab cakes in the pan giving enough room so you can turn them over.
8.  Cook each crab cake about 4-5 minutes on each side, or until they get golden brown. 


9.  While they are cooking, slice up some lemon to serve along side the crab cakes.  
Tips:
* When seasoning the crab cakes, remember that you can always add, but its hard to take away.  So go light on the salt or pepper or anything you are not sure of and then taste before adding the egg.  If you need to add more.
* Want to serve these for dinner with a salad? Make larger hamburger size cakes.  Want to use them for an appetizer? Make them about half the size. 


Spinach Orzo Salad


This was one of my very firsts posts, however due to the beginning of warmer weather...or wishing for warming weather, I thought I'd re-post it. This time I have pictures too! Hope you enjoy!

The salad marks the beginning of summer for me. I got this recipe once from a Rachel Ray cookbook, and I don't know how close it is the original, since I do it mainly from memory. It's really easy and can be done in about 20 minutes.

Ingredients:

1 bag baby spinach
1 box grape tomatoes
1 cup orzo pasta
1 lemon
Olive oil
Salt and pepper
Garlic powder
Handful of basil leaves
1/2 cup Parmesan cheese

Directions:

Cook the orzo according to the package.

While its cooking, dump the spinach and tomatoes in a large serving bowl.  Add the lemon zest too.


Chop up the basil and put it aside to add at the end.

Once the orzo is cooked, drain it and put it back into the pot or the strainer. Drizzle in some olive oil, just enough to make it not stick, then add in the salt, pepper and garlic powder-a few shakes of each should be good. Add the juice of the lemon as well and stir to combine.

The orzo mixture is then added to the spinach mixture and tossed to combine. Top with the basil and cheese, and toss a few more times. Taste, then add more seasoning if needed.


Tips:
*Any kind of tomato can be used in this salad, just cut them into small pieces to make it easier to eat.
*I like to add grilled chicken or shrimp to this to make a complete meal.
*Once made, this will keep in the fridge for a couple days, sometimes tasting better the next day.
*Don't worry about adding the hot orzo to the cold spinach. The heat will wilt it a bit and bring out the oils of the lemon zest too, making it more tasty!